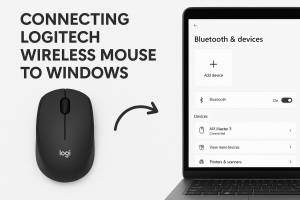
In today’s fast-paced digital world, a reliable wireless mouse can make all the difference in your daily computing experience. Logitech, a leader in computer peripherals, offers a range of wireless mice that are both functional and user-friendly. If you’re wondering how to connect your Logitech wireless mouse to a Windows computer, you’ve come to the right place. This guide will walk you through the process step-by-step, ensuring you can get started with ease.

Why Choose a Logitech Wireless Mouse?
Before diving into the connection process, it’s worth understanding why a Logitech wireless mouse is a great choice. Logitech mice are known for their ergonomic designs, long battery life, and precise tracking capabilities. They offer a clutter-free workspace by eliminating the need for cables, making them ideal for both work and play.
Preparing for Connection
What You’ll Need
To connect your Logitech wireless mouse to your Windows computer, you will need:
- A Logitech wireless mouse
- The USB receiver (also known as the Unifying Receiver) that came with your mouse
- A Windows computer with an available USB port
- Batteries for your mouse, if not already installed
Checking Compatibility
Before proceeding, ensure that your Logitech mouse is compatible with your version of Windows. Most Logitech mice work seamlessly with Windows 7, 8, 8.1, and 10. If you’re using a newer version, check Logitech’s website for compatibility updates.
Step-by-Step Connection Guide
Step 1: Install Batteries
First, make sure your mouse has fresh batteries installed. Open the battery compartment on the bottom of the mouse, insert the batteries, and close the compartment securely.
Step 2: Insert the USB Receiver
Locate the USB receiver that came with your mouse. Plug it into an available USB port on your Windows computer. The receiver is small, so be careful not to misplace it.
Step 3: Turn On the Mouse
Find the power switch on the underside of the mouse and switch it to the “on” position. You might see a small LED light indicating that the mouse is powered on.
Step 4: Wait for Windows to Recognize the Device
Once the USB receiver is plugged in and the mouse is powered on, Windows should automatically detect the new device. You may see a notification in the taskbar stating that new hardware has been detected. This process can take a few moments.
Step 5: Test the Mouse
Move the mouse around to see if the cursor on your screen responds. Click a few times to ensure the buttons are working correctly. If everything is functioning as expected, your mouse is successfully connected!
Troubleshooting Common Issues
Sometimes, the connection doesn’t go as smoothly as planned. Here are some common issues and how to resolve them:
Mouse Not Working?
- Check the Batteries: Ensure the batteries are correctly installed and have enough charge.
- USB Receiver Issues: Try plugging the receiver into a different USB port.
- Driver Problems: Visit the Logitech website to download and install the latest drivers for your mouse.
Cursor Not Moving?
- Surface Issues: Make sure you’re using your mouse on a suitable surface. Optical mice work best on non-reflective, flat surfaces.
- Interference: Remove any objects that might interfere with the wireless signal, such as metal objects or other electronic devices.
Using Logitech Options Software
Logitech offers software called Logitech Options, which provides additional functionality for your mouse. With Logitech Options, you can customize button functions, adjust scrolling settings, and even set up gesture controls. To use this software:
- Download and Install Logitech Options: Visit the Logitech website and download the Logitech Options software. Follow the on-screen instructions to install it on your computer.
- Customize Your Mouse: Open Logitech Options to explore the customization settings available for your specific mouse model.
Advantages of a Wireless Mouse
Using a wireless mouse has several advantages. It offers greater flexibility and mobility, reduces desk clutter, and provides a more comfortable user experience. Whether you’re working from home or gaming, a wireless mouse can enhance your productivity and enjoyment.
Final Thoughts
Connecting a Logitech wireless mouse to a Windows computer is a straightforward process. By following the steps outlined above, you should be able to enjoy the benefits of wireless technology in no time. Remember, if you encounter any issues, Logitech’s customer support is always available to assist you.
With a wireless mouse, you can enjoy a more organized workspace, increased mobility, and the high performance that Logitech products are known for. Happy clicking!

